Friday, September 11, 2009

Scrap that little newborn!


I am so thrilled that I am able to scrap again. You can not imagine how much I missed it. I just love all the goodies and create something. This time I made a double spread of pictures of Jinte on the day she was born and was admitted in the hospital. I used one of the sketches from Got Sketch as an inspiration.

About
Got Sketch: They have a great new class: Got Sketch Doubles. I took Got Sketch 102, Got Sketch Express and Got Sketch Mini and I am considering taking this one. The sketches from Valerie, Janna and Lynn are always great to work with and it takes so much of my picture stash away.

Cardstock:
Bazzill
Patterned paper:
October Afternoon
Journalling card:
October Afternoon
Stickers:
October Afternoon, American Crafts Thickers
Rub-ons:
Making Memories, Heidi Swapp Fuzzy rub-ons
Brads:
Doodlebug, Queen & Co
Misc: Buttons, ribbon, staples


Ik ben zo blij dat ik weer kan scrappen. Je kan je niet voorstellen hoe erg ik dat heb gemist in de afgelopen maanden. Ik vind het zo heerlijk om lekker met al die spullen te werken en er dan ook nog eens iets van maken. Deze keer heb ik een dubbele layout gemaakt met foto's van Jinte op de dag dat ze is geboren en opgenomen werd in het ziekenhuis. Als inspiratie heb ik een van de schetsen van Got Sketch gebruikt.

Over Got Sketch gesproken: Ze hebben een geweldige nieuwe workshop: Got Sketch Doubles. Ik heb Got Sketch 102, Got Sketch Express en Got Sketch Mini gedaan en ik denk er serieus over na om deze ook te gaan doen. De schetsen van Valerie, Janna & Lynn zijn altijd geweldig om mee te werken en zo kom ik ook nog eens van al die foto's af!

Cardstock: Bazzill
Dessinpapier: October Afternoon
Journalling card: October Afternoon
Stickers: October Afternoon, American Crafts Thickers
Rub-ons: Making Memories, Heidi Swapp Fuzzy rub-ons
Brads: Doodlebug, Queen & Co
Overig: knopen lint, nietjes


Thursday, September 10, 2009

I scrapped again!

Ooooooh, did I miss scrapping! Marjan returned from her trip to Greece the day before yesterday and we texted that we were going to scrap last night. I had to make some room here and there but I must say: The attic (and the huge table) is a great place to scrap.
In the last couple of weeks I took an enourmous amount of photos and did not have anything ordered to print yet. That I will be doing tomorrow. So I printed some pics myself and finally scrapped again. I still had some pinks lying around and finally got to use them.
These pictures were taken on the 29th of July (Jinte was born on the 28th) while she was lying in the incubator on the neonatology ward. I absolutely love the big picture. Can't describe the love that is shown in my mens eyes!
Cardstock: Bazzill
Patterned paper:
Heidi Swapp
Stickers:
American Crafts Thickers, October Afternoon
Rub-ons:
Heidi Swapp (LOVE those Fuzzy Rub-ons)
Flowers: Prima Marketing
Brads:
American Crafts, Karen Foster, Eyelet Outlet
Pearls:
Prima Marketing
Rhinestones:
Prima Marketing, Heidi Swapp
Metal clip:
Making Memories
Twill:
Melissa Frances
Misc: Brad, plastic flowers, chipboard

Oooooh, ik heb het scrappen zo gemist! Marjan kwam eergisteren terug van haar vakantie naar Griekenland en we hadden al ge-sms-t (is dat wel een goed woord?????) dat we gisterenavond zouden scrappen. Ik moest op zolder nog het een en ander opruimen en ik moet zeggen: Het is een geweldige plaats om te scrappen. Die enorme tafel!

De laatste paar weken heb ik een enorme hoeveelheid foto's genomen en heb nog steeds niet de gelegenheid gehad om ze te laten afdrukken. Dat is mijn doel voor morgen. Dus heb ik zelf een aantal foto's afgedrukt en ben er mee aan de slag gegaan. Ik had nog wat roze papier liggen dat ik eindelijk kon gebruiken.

Deze foto's zijn genomen op 29 juli (Jinte is geboren op de 28e) toen ze in de couveuze lag op de neonatologie. Ik vind dit een geweldige foto, de liefde die uit de ogen van mijn mannen straalt, onbeschrijflijk!

Cardstock: Bazzill
Dessin paier: Heidi Swapp
Stickers: American Crafts Thickers, October Afternoon
Rub-ons: Heidi Swapp (LOVE those Fuzzy Rub-ons)
Bloemen: Prima Marketing
Brads: American Crafts, Karen Foster, Eyelet Outlet
Parels: Prima Marketing
Bling: Prima Marketing, Heidi Swapp
Metalen clip: Making Memories
Twill: Melissa Frances
Overig: Brad, plastic flowers, chipboard


Tuesday, September 08, 2009

Make & Take, Lip Balm Holder

Months ago I promised you a tutorial for the Make & Take I did. I never did.............. So it's about time. Have fun!

Supply list:
  • A lip balm, Chapstick, Lip Smackers or something similar. I love the Lip Smackers because they come in all different colors.
  • About a half a sheet of cardstock
  • A tiny piece of patterned paper

And some stuff to embellish like rub-ons, maybe a charm or something. This project can be easily adapted to a gift for a boy, man, teacher or whomever you like to give it to.

If your Lip Smackers or Chapstick has a colored top you might want to match your cardstock and patterned paper to it.


This is a great and very affordable gift which also gives you the opportunity to get rid of some of those scraps we all have collected over the years! I think I can make about a 1000 of lip balm holders to get rid of my scraps, LOL

Okay, here we go. If something is not clear please leave me a comment and I'll get back to you on this!


Step 1:


We now need to cut our cardstock. We need two pieces (exactly the same) of 3 1/2" by 5 3/4".Score both of those pieces at 2 1/2" and 3 1/4" on the short side of the cardstock (so from top to bottom on the 3 1/2" side) Step 2:
We need to make two cuts in only one of the pieces of cardstock. (JUST ONE!) The first cut (bottom) has it's center point on top of the right score line and goes until the middle of the cardstock. (length about 3/4")If you want to know where this cut has to start (height wize): Put your lip balm stick in the middle and mark the bottom of with a pencil. This is going to be the top part of your cut. Your lipbalm is going to lean on this cut later on. The second cut also has it's centre at the same point but the cut is about twice the size (about 1 1/2") Height wize is't going to be in the middle.The whole thing will look like this:
Step 3:

We now need to choose our ribbon (about 6" for each side) and attach that with tape on the left and right side of the cardstock. After that you have to adhere the two pieces of cardstock together. The piece of cardstock with no cuts will be your outside cover and the one with the cuts is going to be on the inside. BE CAREFUL: FIRST put your ribbon in there and only put adhesive on the side which has the cuts and not on top of your two cut strips (I did that the first time and everything was stuck together!)

Step 4:

Round off the outside corners with your corner rounder. You can now decorate the inside and outside as you please. I used a piece of patterned paper slightly smaller than the cardstock and decorated that with some circles (both normal and scallopped) in different colors cardstock and the same patterned paper that I used to cover my holder. I adhered the circles together with foam tape to give it a more 3D look. I put a rub-on on the last circle (Mine is from Scenic Route) and put the circles on my holder. I also put rub-ons on the spine and on the inside
Step 5:

Last step: Your Chap stick!Cut a piece of patterned paper just as long as your Chap stick but make sure it won't cover the turning part or the lid! Make it about 1/8 of an inch wider than your stick. The best way to adhere it to your Chap stick is to run it through your Xyron. If you don't own a Xyron, make sure there's adhesive all over the paper. When you've wrapped it around your chap stick cover the overlapping part of your paper with Scotch tape (That's invisible) You can add a rub-on or sticker to the stick.

The only thing that needs to be done: Give it away! I can't wait to see what you all made! Please show me!
I hope this all made sense to you. I had a lot of fun making these little gifts and kept thinking about all different occasions to give them away. What about a apple/cinnamon Lip Smackers and then with a Christmassy holder?????

Monday, September 07, 2009

School has started again!

Today school started again! Joram is now in third grade and has this great teacher: Miss Jill. He was soooo nervous last night, he had such a hard time falling alseep. He was afraid he had to take a reading test today. For those who don't know: joram has a very hard time reading. At this point he reads at the level of a first grader. Very sad and frustrating for him. Last year they tested him for dyslexia and was tested negative. So one of these days I am going to make an appointment with his teacher to figure out where do we go from here.

He came home for lunch being so excited. He had a great time. There's a new girl in his class (and she's nice, Joram said), he got to talk about his sister Jinte and the best of all: He and Merel (his BF ever since they started playgroup) are sitting together for the first time. You should have seen the smiles on their faces. Priceless! By the way Elise (Merels mom) also has a pic on her blog!


Vandaag is de school weer begonnen! Joram zit nu in groep vijf en heeft een geweldige jif: Juf Jill. Hij was gisterenavond zo ontzettend nerveus, hij kon er niet van slapen. Hij was bang dat ie vandaag een leestest zou moeten doen. Voor diegenen die het niet weten: Joram heeft erg veel problemen met lezen. Hij leest nu op het niveau van een leerling uit groep 3. Hij is vorig jaar getest op dyslexie maar dat was negatief. Ik ga binnenkort met de juf rond de tafel om te kijken wat we nu verder moeten.


Hij kwam tussen de middag superenthousiast thuis! Hij had het geweldig naar zijn zin gehad. Er zit een nieuw meisje in de klas (en ze is erg aardig zei Joram), hij heeft over zijn zusje Jinte verteld en het beste van alles: Hij en Merel (zijn beste vriendinnetje sinds de peuterspeelzaal) zitten eindelijk samen in een groepje! (voor de eerste keer) Je had hun gezichten moeten zien, prachtig! Elise (Merels moeder)heeft er ook een foto van op haar blog.

Sunday, September 06, 2009

Childrens Vacation Week 'De Beuk'

The last three years Joram went to childrens vacation week 'De Beuk' in the last week of summer vacation. A week full of fun, playing games and being outside. And a week where you get to see quit a bit of his class mates before school starts again. Every year there's a new and exciting theme. This years theme was Jungle!

On the first day Joram did something I would have never expected: Joram actually ate a grasshopper and a worm! Even the thought gives me the shivers. I just hope they took a pic of that moment. I guess he is not allowed to complain about his dinner ever again.........

The parents are not allowed on the site until the last evening so they have no idea what it looks like. The kids build they own hut on the first day and that is going to be their 'home' for the week. Their bags are there and they have lunch there. Jorams group was called The Voltures and they won the main price for building theirs (A golden banana........) He can't wait until next year and as for me: I can't wait until the cd-rom with the photos on it is put in my mailbox.


De laatste drie jaar is Joram in de laatste week van de zomervakantie meegeweest naar de kindervakantieweek 'De Beuk'. Een week vol met plezier, spelletjes en heel veel buiten zijn. Een week waarin hij al heel veel van zijn klasgenootjes weer ziet voordat de school begint. Ieder jaar is er een thema en dit jaar was het: De Jungle!

Gelijk op de eerste dag gebeurde deed Joram iets wat ik nooit had verwacht: Hij at een sprinkhaan en een meelworm. Alleen de gedachte eraan geeft me al kippenvel. Je snapt dat hij thuis nooit meer kan klagen over het eten. Ik hoop alleen maar dat er iemand een foto heeft gemaakt van dat moment.

De ouders zijn niet welkom op het terrein tot de laatste dag. Zij hebben dus geen idee hoe het er uit ziet. De kinderen bouwen op de eerste dag met hun groep een hut die ze de hele week als hun 'thuis' beschouwen, hun tassen staan er en ze lunchen daar. Joram zijn groep heette De Gieren en ze hebben zelfs een prijs gewonnen voor de mooiste hut (Een gouden banaan......) Hij kan niet wachten tot volgend jaar en voor mij geldt: Ik kan niet wachten tot de cd-rom met foto's in de bus valt.

Thursday, September 03, 2009

My Scrapbook Studio

Ever since we knew I was pregnant (which was NOT until 17 weeks!) I knew my scrapbookroom had to be moved upstairs to the attic. Even though there's a lot more room in the attic, I hated saying goodbye to the room I was in. I loved how everything was organized in there and how close I was to Jorams room (And no, he never woke up from me hammering away, LOL)


When we started decorating the nursery everything was packed in boxes, moved to the attic and they have not been touched until last week. In the last two months of my pregnancy I was not worth a dime, and with the hot weather I hated being up there. So last week I finally started to unpack those boxes, sort stuff out (Can't believe why I kept all those empty packages of Quickutz dies for all those years...........)

A couple of months ago I bought a huge size table (200x100cm) so I have a great worksurfacewith the possibility to keep stuff within reach. At this point of unpacking and organizing the table is mainly used for putting stuff on................... I will get there eventually. Now it already looks better than on the picture.


And if you are also trying to organize your scrapbook workspace you might want to consider buying a book about it. Years ago I bought How to organize your Scrapbook workspace by Memory Makers. There's so many good tips in there. If you are smart you might want to Google the terms SCRAPBOOK and ORGANIZATION to get some amazing tips for free (and the money you save you can spend on supplies............)

It's about time I start to scrap again. I miss it!
BTW; The cute guy on the photo is my dear husband Richard!

Toen we wisten dat ik zwanger was (en toen was ik al 17 weken zwanger) wist ik dat ik mijn scrapkamer naar zolder zou moeten verhuizen. Op zich niet erg want er is veel meer ruimte op zolder, maar ik vond het ook wel weer jammer om afscheid te moeten nemen van mijn scrapkamer zoals die was. Ik vond het geweldig hoe alles in die kamer georganiseerd was en hoe dicht die kamer bij die van Joram was (En hij werd echt nooit wakker van al dat gehamer van mij!)


Toen we de kinderkamer gingen inrichten zijn alle spullen in dozen gepakt, naar de zolder verhuisd en niet meer aangeraakt tot vorige week. In de laatste twee maanden van mijn zwangerschap was ik echt niets waard en het hete weer (en daardoor de hoge temperatuur op zolder) maakte dat ik bijna nooit op zolder was. Vorige week ben ik eindelijk begonnen met het uitpakken van dozen en spullen uitzoeken (Vraag me niet waarom ik al die jaren de verpakkingen van de Quickutz stanzen heb bewaard)


Een paar maanden terug heb ik een enorme tafel gekocht voor op zolder zodat ik een geweldig werkvlak zou hebben en ook nog de mogelijkheid om er van alles neer te zetten wat ik binnen mijn bereik wilde hebben. Nu moet ik zeggen dat die tafel in het proces van opruimen vooral wordt gebruikt om spullen op te leggen. Uiteindelijk wordt het geweldig! Het ziet er nu alweer beter uit dan op de foto.


Als je ook je scrapkamer wilt organiseren is het de moeite waard om een boek erover aan te schaffen. Ik heb jaren geleden het boek How to Organize your Scrapbook Workspace gekocht van Memory Makers en dat staat vol met goede tips. Als je slim bent dan zoek je ook tips op het www. Als je STORAGE en ORGANIZATION Googled vind je heel veel informatie (weliswaar in het Engels) En het geld wat je dan uitspaart kun je dan weer scrapspullen voor kopen...............


Het wordt tijd dat ik weer ga scrappen, ik mis het echt.
Trouwens; die leuke man op de foto is mijn lieve man Richard!

Tuesday, September 01, 2009

The Scrapping Cottage

My absolute favorite online store if it comes to dies is the Scrapping Cottage. They have a great selection of all brands and their prices are really good. And for me, as a international customer, the shipping rates are more than reasonable. Last time I ordered some of the new Quickutz embossing folders and I must say: They are awesome!

At the Scrapping Cottage Blog they are running a great contest which is really easy to participate (Don't we just love that?) You can see the details HERE. The best of all: You can win $250 to spend at their store.

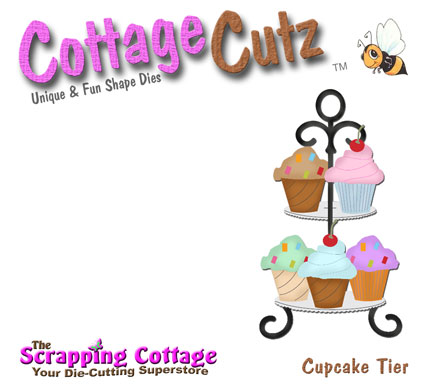
Besides the great selection, prices and shipping costs they also have their own exclusive dies: CottageCutz. Over the last few months it became a pretty good selection of fun shapes. The new Halloween dies are there to pre-order. My favorite CottageCut is the cupcake stand. I am such a great fan of cupcakes and I have never seen a cupcake stand die before. If you want to buy it, you can see it HERE.
Mijn favoriete online winkel voor het kopen van dies (stansplaten) is de Scrapping Cottage. Ze hebben een hele grote selectie van allerlei merken en ze zijn ook nog eens goed geprijsd. En daarnaast (wat voor mij als internationale klant belangrijk is) zijn de verzendkosten meer dan redelijk. De laatste keer heb ik de nieuwe embossingfolders van Quickutz besteld en ik moet zeggen: Ze zijn echt geweldig!
Als je naar de Scrapping Cottage Blog gaat kun je zien dat ze een geweldige wedstrijd hebben waar je $250 kan winnen die je vrij kan besteden in hun winkel. Het is ook nog een heel makkelijke wedstrijd om aan mee te doen! Je kan alle details HIER lezen.
Naast de grote selectie, de goede prijzen en lage verzendkosten hebben ze ook nog eens hun eigen dies: CottageCutz. In de afgelopen maanden is het een redelijk grote collectie geworden van hele leuke vormen. De nieuwste Halloween dies kun je nu alvast reserveren. Mijn favoriete die is die van het cupcakes plateau. Ik ben gek op cupcakes en heb nog nooit eerder een die ervan gezien. Als je hem wilt kopen kan dat HIER.