Showing posts with label craft. Show all posts

Sunday, September 21, 2014

Shoebox turnes into caddy (photo heavy tutorial)

I am a complete sucker for caddies, baskets, containers, boxes and anything that holds items. Thanks goodness I am a scrapper so I need a lot of those to store all my supplies. I have the cutest white metal containers that have pink numbers on there. They store my bling, my stamps and my glue stock. I love the two galvanized wired baskets with handles that store my wooden embellishments and my made cards.
A few weeks back I came acroos a tutorial on Pinterest that showed how to make a caddy from a single shoebox. Right up my alley as you can imagine. 
So I Pinned it.  I thought I Pinned it and went looking for it after we bought our little lady some winter boots. The perfect box for a caddy. But my Pin was nowhere to be found. So I had to rely on my photographic memory................ uhm, well, just on what I remebered seeing while Pinning it. Or actually; not Pinning it. Well, you get the point. 

I made photos of the work in progress so you can see what I did and try it yourself when you have a shoebox ready. I apologize for the quality of the photos but I took them in a kind of dark hallway and did not turn on any light.............

First you take the box (do NOT put the lid away, you will need it later!) and measure the long side of the box. In my case it was 30cm (about 12"). I marked the middle both on the top and bottom of the box and  used that mark as the middle of my 10cm..... 

You lost it already right? 

You wil have to cut a triangle out of both long sides. Trust me, the photo will clear this all up. I measured the long side and came to 30cm. I divided that in 3 so that the finished product would look like a caddy. That is the 10cm I was talking about before.  So you divide the box length in three and that is the amount you will need to cut out. So on my box: I measured 5cm from the middle to both sides and cut it to the mark on the bottom of the box (the mark that shows the middle)
Your box will now look like this:  

Now you need to fold the box in half, You can score from the bottom of the triangle to the bottom of the triangle across the box. What I did was this. I put my ruler in the box en then folded the box with the ruler in there. No fuzz, just fold.......
Did I already tell you that the easuring you did before is the only measuring you will do in this project? Cool, right? 
After folding it your box should look like this: You must admit, it already looks like a caddy, right?
From now on things will only get easier. 
Now you need the lid to make the sides. Simply put the lid over the side (i did not take a photo of this but let me try to explain: The lid will have to stand up straight and cover the side of the caddy. It will look way to long...... 
Mark the side of the caddy on the box and do this for both sides. Cut the lid of the box. After cuttong your lid will look like this: 
Now attach your lid pieces to the caddy and tape it together. I used duck tape but I guess you can use packaging tape or any wide tape. As long as it sticks.
This is what your caddy will look like when it is unfolded. (that little foot you see is our little lady.....)
Next, fold the box over into a caddy shape and tape the bottom together so the caddy will remain a caddy no matter what.  
I simply put duck tape over the bottom sides so it also functions as a protector of the caddy.

And voila, you are done!!!!! This is the actual caddy aftyer 15 minutes of work. 
Now you can cover it with fabric, paper or even paint. You can make a handle in the top middle but I did not do that. 
I covered mine with double sided wrapping paper and now I need to find something to put in...... I had no special technique for covering it, I just made sure all sides could be covered by the paper and wrapped it like a gift. 
And yes, the paper does look wrinkly but that is just the Tacky Glue not being dry yet. I have had so many Tacky Glue expereience that I now know things will all look well in the end. They do.

I hope this all made sense. Please ask if you have any questions! Thanks for stopping by and have a great and creative week! 

Sunday, September 07, 2014

Mason jars, have to love them....


When we visited Canada last year I stacked my suitcases full with Mason Jars. Not the regular ones, but the ones with 'Canadian' on them. I filled met with socks, underwear and everything else that would fit in there to make sure they would survive the trip. They all did and are now used for storage in my studio. I filled them with buttons, flowers, spools, tins and even chandelier pendants. Love the way they look.

But one thing I never didand always wanted was to sort of decorate them. So this week I finally bought some supplies for that and got out my tin of vintage keys I scored on Ebay a while back. So with some twine, butlap, hemp cord, a door knop and keys I made it into the cutest jar ever. 

I started wih the lid. I did not have a full lid, only a ring with the loose lid in there so I started by glueing them together so it was transformed into an actual lid. Then I punched a hole in the middle with my biggest eyelet puncher (the old fashion one, you know, with the hammer ;) ) My advice: First punch the hole and then glue the pieces of the lid together, so much easier
At last I spray painted the lid white and added the knob. After that it was only a matter of decorating with the twine, burlap and the hemp cord.

I could call this a Pinterest challenge done since I have a Mason Jar board on Pinterest. Hhhhmmmmm, maybe I should look for a new challenge to do. But furst things first. I still have to start Chriss' challenge at Let's Scrap. Love recipe challenge and I do want to play.

Have a great Sunday!


Wednesday, January 11, 2012

Free printables

I have to admit; I am a sucker for free printables. And when you browse around the internet you will find tons and tons. But since I am browsing way too much anyway I thought I might as well link some cool ones up for you. So your visit here is not completely useless, LOL.
Though I did finish a LO today so I am up to date on the LOAD challenge at Let's Scrap. Which is by the way hosted by one of our fabulous DT members, Cathy. Cathy, thanks so much for doing this, you are one of the reasons why Let's Scrap rocks!

Now let's get back to the printables. Like I said, there are so many free ones out there. I used to store most of them on my computer or bookmarked the sites. Now I have many many of them pinned on my Pinterest board. Gotta love Pinterest!

There's some very cute free printables at Love vs Design, if you are a graphics lover you will definitely like these.

You will find lots of free printable journaling tags/blocks at Creativity Prompt. Every time I print one of these I always wonder why I still buy journaling blocks

Another great set of tags/blocks I found at the Scrap Pit, these come both in red and black and can be used for so many different things. 

I absolutely love ledger papers of all sorts. I love to scrap with them and you can count on me having every sort of ledger scrapping paper available. Just can not resist those. 
MelStampz has a great one, just love the blue.

Shareese-Pieces (love that name) is having a great one for all of you who have a girl. And if you do not have a girl you might want to use it for yourself. We HAVE to scrap ourselves too, you know. 

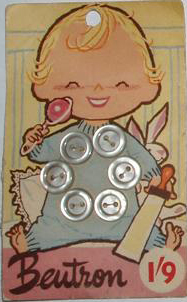
And for all of you who can not resist button cards, here's such a cute one to use on a baby welcome card. I still need to make one for a baby that is about to be born, so I might use this one. 

And for the more lazy types among us, there's always the round ups. They are great if you do not want to spend the entire night on your computer. You might as well take advantage of other people's crazy habits; looking for free printables. A great site for a printable round up is Ishare printables

I have done enough for today, I am signing off and will hopefully be scrapping some more. Need to stay on my toes with the LOAD. 
Thanks for stopping by!

Thursday, October 13, 2011

Crafty Links

Every once in a while (well, maybe a bit more than that, I admit..............) I get totally carried away on the internet and before I know I have 20 different pages open with all stuff I'd like to do, make or participate in. Useless to say that I don't even have time to do any of these.
Since I got invited to Pinterest I became an avid Pinner and have my links and projects more organized than I ever did. But: When I don't start making stuff those lists will only get longer and longer. Maybe I should go for a different approach?
While browsing I came across some great projects and tips I wanted to share with you!

I have more shoes and boots than I will ever be able to wear out in my entire life so this post was very interesting to me. Make your own custom clips for your shoes so one pair can be 20 different ones. I must admit I am not too fond of animal prints but you'll get the point. Maybe this is a great excuse for buying those little black shoes I saw. The clips would be perfect for those! You can find the complete tutorial her at Thanks I made it


With Canadian Thanksgining last weekend and Halloween and American Thanksgiving coming up I always get tempted to buy cookie cutters. I have many but you can never have enough cookie cutters (please tell me I am right!) Each year I want ot bake cookies for all the teachers, friends and family but never have the time. Cookie cutters are not a normal thing here to have or to buy. So when I really need a particular shape I have to accept the fact that I won't be able to get it. Way back I looked at tutorials on how to make your own but that was way too complicated for me. I needed  way to many supplies and tools and I could just see myself not being patient enough for making them properly and then end up with all those supplies and NO cookie cutters! I came acroos this blog and this AWESOME tutorial at Happy Find: Make you own cookie cutters with supplies most of us will have in their homes anyways. Thisi s one of those things where people will say: Why did I not think about this before? Wel, simply because we did not! I will be doing this tutorial for sure and I'll post mine here, I promise!

I love all kinds of crafts but my favorite passtime is and will always be scrapbooking. There's tons and tons of inspiration to find on the internet so I am not going to put any of those links up here but I do want to share this one: The Art of Photo-less Scrapbooking by Paula Gilarde at Debbie Hodge. Sometimes you do have a memory you want to scrap but no photo's. This article is filled with great tips!

And with Halloween close by I wanted to share this awesome project I found on Aly Dosdale's blog. It is such an easy thing to make and it would even be fun doing it with the kids. I love the classy look it has and I can imaginem aking these in different colors for different seasons. You can find the detailed instructions HERE.

And while I was waisting time again on my favorite time waister Pinterest (But oooooh, I LOVE pinterest!!!!!) looking for tattoo ideas I came across this great idea for DIY male jewelry. Not like my DH is going to wear it but maybe DS wil....... These bracelets for men, or even for yourself, they look pretty cool, are made out of zippers! Such an awesome idea and they seem pretty easy to make. Well, maybe except for the candle part, I might be burning down the house. Mmmmmh, maybe someone is willing to make them for me???? You can find photo's and a great tutorial HERE on Thanks I made it! And while you are there anyway you might want to take a look at all the DIY jewelry, such great things.

Thanks again for popping by and I hope to 'see' you again!

Friday, December 10, 2010

Paper Wreath tutorial

If you arrived here from The Scrap Shoppe: Welcome to my tutorial for this years Home Made Christmas.

This would be a great home decor item for Christmas but leaving the Christmas wish behind, it would make a great all year round wreath. What about putting 'welcome' on there and hanging it on your front door? (Just make sure it won't get wet.....................)

I made this and I was amazed about how easy this was and how good the final result. I am going to try and explain to you how to make this. This is what you need:
  • Styrofoam wreath (mine was about 8" diameter)
  • Old book (I used a paperback book)
  • Pins (regular or short ones, does not really matter)
  • Ink for the edges
  • Ribbon
You don't really need the following items but you can if you want to spice it up:
  • A decoration piece for in the wreath (I used a wooden star about the size of the inner opening of the wreath, this can be your guideline for buying))
  • Glitter spray (there's probably tons of people that would say you can't, but I used glitter hairspray, I use it all the time on projects and never damaged anything and it is a frugal option)
You start with tearing pages out of your book. Don't try and do it to neatly, but do make sure you still have whole pages. I started with 50 pages and I could not really tell you how much I used in the end but you can always take more out or throw the leftovers in the waste paper (or your fire place, ha!)
Then ink the sides of your pages. Again: Don't try and do it to neat. This is a great project to let go of your perfectionism, I had a hard time with it and at the same time lots of fun.....

When you have some pages inked you can started attaching them to the wreath. I used those tiny needles that you use for decorating, but you can use whatever you have lying around. Well, as long as they don't come out the other side of your wreath I guess...................)

The hardest thing for me to explain is how to fold the pages. I tried to take pics of it, but it is always hard to takes pics of the entire process.
You start by folding your pages over lenghtwise BUT: don't really fold/crease it! You just sort of put it together without really folding it (this does not really sound too good does it? I just hope the pics are more clear than I am). When you are done folding attach it to the wreath as showed in the pic. This will be your first layer. There are three layers in total. Use as much pins as neccesary to keep the papers in place. Mine has two, sometimes three.
This might be handy to mention: Most of my pics were taken from the back of the wreath. For me it was the handiest to work on the back too, but I guess that is all up to you!

You keep putting pages on until your first layer is completely filled. Thep aged overlap a little about a 1/3" or so. Again, don't be to precise, it can be half an inch on the one and 1/4 on the other one. 
When your first layer is done we keep on moving to the second layer: This layer will be placed about two inches lower than the first one. I swear I took pictured from starting the firstl ayer too but I can't find them anywhere so you will have to do it with the pic of when the second layer is on. You can see in the pic that the second layer is much lower than the first. Again: don;t measure anything, just do it by sight. Trustm e, it will work out great. By the way: This pic below was taken from the top
When your second layer is done the back of your wreath will look like this:

And this will be the front: Again you can see that my pages are not lined up at all. How are we doing with letting perfectionism go?
If you are still with me here you are doing great, we are almost done. We are now starting the third layer. This layer will will placed overtop of the firstl ayer but than facing the other way (so outside the wreath) This will make your wreath look fuller and cover up any of the styrofoam that was still visible after the first two layers. The pic will show you where about to place the third layer and what it will look like when you're done (again: from the back)


At this point your wreath is done and you can start decorating. You don't have to if you like it like this and you can use whatever you like to decorate it. If you decide to leave it like this you will only have to attach to ribbon to hang it. I used three different kinds of ribbon and fibers and placed them just around the wreath on top and bottom.
This is what I did with the star: I inked the edges with the same color ink I used for the pages and cut a shape with my Silhouette and adhered it to the star. You can use stickers, chipboard or whatever you like on it. Just look at it like a little canvas.
I attached the star with the twine that came with it but you can use whatever twine or ribbon that you like. This is what my wreath looks like.


I would love to se what you came up with because I there can be so many different looks to this. So please let me know, or leave a so I can check it out. And I promise that I will post the ones that I know about. And if you have any questions let me know, I would be more than willing to help you out.

You can place this tutorial at your blogs but I would be very pleased if you would link back to this post and my blog!
If you like what you see here please become a follower.
Thanks for playing along.

Have a great weekend!

Wednesday, November 17, 2010

Crafty links

I thought it was time to share some crafty links again. Sometimes I am looking for inspiration and I end up being on the internet the whole night. Crap, I hate that! There's so many nice things to see and to do, I need more TIME!

First of all, one of my favorite DIY blogs is the one from Cathe Holden, Just something I made. She also posts on SCJohnson with all fun projects. One of the projects that Cathe posted there and I still want to make is the easy ziploc bag tote, such a cool idea. Like I said: I need more TIME. There's tons of projects from Cathe on the SCJohnson site but this is also one I like: Personalized notecards. You do not have to be crafty or artistic to do this project, just do it and have fun!

One of the greatest projects on her own site is the Christmas advent calender. She already posted about that project last year but this year she took it even to a higher level. This is such a cool project. I wish I could find some wooden spools................................ If you look around on her site you will find more and more great projects you might want to do. Be careful, before you know you will be behind your computer the whole night.......

At OnceWed they have the cutest download of free heart doilies. You can see and download them HERE.

At Eat Drink Chic (love that one) they have a great download for a love and thank you card. I have a pic posted here. Same as before: If you start looking around at this site you will be lost in time. And, not really a project to DIY but even so cool. This post is called McFancy and you really have to check it out. Isn't that amazing?

For those who celebrate Thanksgiving there's a great free download at Silverbox Creative. These can be used as napkin rings, conversation pieces or made into a paper chain by the kids while you are cooking dinner. You can check them out and download them HERE. At Skip to my Lou Cindy posted about 10 free printables for Thanksgiving. Definitely worth to ckeck it out!

After seeing all this can you imagine why I said; I need more time????

Monday, October 11, 2010

Another sock Monkey (+instructions) / Nog een Sokaap (met instructies)

I made another Sock Monkey. And I have to say: This one is soooooo cute. I made this one from a small pair of girls socks (I think it would be the size of a girl about 10 yo) and the monkey is about 7" high (from head to toe). I think these are Mary Engelbreit socks, they do have those colors. Please correct me if I am wrong.


Other than my first three monkeys I made this one with the sewing machine and oh my gosh, is that ever fast! I think the whole monkey took me about an hour. Ofcourse you still have to attach the arms, tail and ears by hand but making all the parts with the machine is a huge timesaver. There are so many instructions out here so I am not going to make my own (just call me lazy). The first set of instructions I am posting I found somewhere on the internet and I love the way they look. I you look on the left bottom of the right page you can see the date of publication: November 1955. Isn't that ever cool?
Though this is the the prettiest set of instructions I have they are not really too clear. So please forget this one and look at the second one. They have much more detail so you know how to cut and sew. If you decide to make one: Please show me the results! I would love to see what you came up with.

Have a good week!


Ik heb weer een Sokaap gemaakt en ik moet zeggen: Deze is echt superschattig. Deze heb ik gemaakt van een paar meisjessokken (ik denk ongeveer maat 36) en de aap is ongeveer 18 cm hoog (totale lengte). Volgens mij zijn de sokken van Mary Engelbreit want dit zijn wel haar kleuren maar daar kan ik me ook in vergissen. Anders dan de andere drie apen die ik eerder heb gemaakt heb ik deze met de naaimachine gemaakt. En jeetje, wat scheelt dat een hoop tijd! Natuurlijk moet je nog steeds de armen, staart en oren met de hand aannaaien maar het feit dat je alle lichaamsdelen met de machine kan doen! Ik denk dat ik in een uur klaar was met de hele aap. Over tijd besparen gesproken. Er zijn denk ik duizenden instructies voor het maken van een sokaap op het internet dus ik ga ze zeker niet zelf maken (of noem me gewoon lui......). De eerste afbeelding met instructies heb ik ooit ergens op het internet gevonden en die zien er zo geweldig uit. Als je op de rechterpagina liksonder in de hoek kijkt zie je de datum er afgedrukt staan: November 1955. Echt helemaal geweldig!
Maar ondanks dat het een van de mooiste afbeeldingen met instructies is die ik heb is het zeker niet de duidelijkste. Dus als je van plan bent om een aap te gaan maken gebruik dan niet de eerste maar de tweede afbeelding met instructies. Die laat veel beter zien waar je moet knippen en naaien. Als je besluit om er eentje te maken laat mij dan het eindresultaat zien: Ik zou het heel leuk vinden om te zien wat jullie hebben gemaakt!

Een hele fijne week!
The DIY Show Off

The Girl Creative