Showing posts with label sewing. Show all posts

Monday, February 07, 2011

Long time no see.................

I have been very very busy. Taking over Let's Scrap just a week before a HUGE blog hop starts is a garantuee of getting things in order. I am now totally worked in on all the stuff there needs to be done. The blog hop made a lot of new members joining Let's Scrap. We love that!
Something else we did and I think it is sooooo cool: We started two new challenge groups. One is '100 layouts in 2011' and the other one is 'Let's Scrap our stash'. Both of them are pretty self explainatoiry. The 100 group is more or less set up for anyone who wants to achieve a goal in 2011. That could be a 100 layouts, but also 50 or 200. Just want to reach that goal.
The stash group is also fun. As the name says: We need to scrap our stash. You can join just for motivation, you can join for tips, but also to keep track of what oyu are doing. There is a thread where you can keep your monthly records. And as it is at Let's Scrap: Nothing difficult or pushy, just enjoy! Just join Let's Scrap and check it out!

And then there's the Blog Hop still going on. The design team came up with so many cool challenges, I am impressed! I started at Resolution #1 and I hopefully will be working on #13 tomorrow night. And the hop does not end until the 14th of February, so I will have time enough. If you still want to join please take a look at the top post of my blog, it has all the information you need. 

Well, now it is time again ot share a layout I made. I did quite a bit last week but I am only going to share this one. DD Jinte loves to dress up. She just walks around with necklaces around her neck the whole day and puts on sunglasses, bling shoes (from my MIL bought at the Gap, thanks Janny, she loves them!) and not to forget: That blingie tiara! These pics were taken at 6.30 in the moring so she is still wearing her PJ's. 

Cardstock: Bazzill

Stickers: American Crafts Thickers
Rub-ons: DCWV, Heidi Swapp (fuzzy)
Kraft envelope: Maya Road
Chipboard dress: K and Company
Tickets: JBS
Border punches: EK Success
Misc: Rick rack, flower border, rhinestones, sewing machine

Thanks for dropping by and have a great week!

Saturday, November 20, 2010

I have been featured at TipJunkie

I was looking around on the internet to find something I did find before and never bookmarked and now I can't find it anymore. Which makes me soooo mad!
But something bad can turn out in to something good whenever you expect it the least. I was looking for how to make socks into mittens. So I googled that and it came up with tons of ideas, instructions and tutorials but just not the one I was looking for. But I found something else: I was featured at Tip Junkie. Remember the post about the little tag softie I made for DD Jinte (You can find my original post HERE)? Well, appearantly is was cute enough for others to see. And talk about others: Tip Junkie has almost 6000 fans on Facebook. I don't even want to know what the amount of followers and subscribers are.............
You can read the entire post HERE

For all of you: Have a good weekend! And for those who celebrate Thanksgiving this weekend: Be happy and grateful for all that you have...........

Monday, October 18, 2010

Baby label softie with tutorial / Baby label knuffel met instructies

DD Jinte loves loves to chew on labels and tags. I had a little washcloth lying around and I was ready to put back in her dresser. At the same time I had some ribbon lying on top because it had to go to my studio. And all of a sudden the lightbulb went on and my idea was born: I am going to make a tag/label softie for her. The idea is fairly simple and I know that tons of items like this are available. I will try and explain how I did it. Even a very novice sewer can do this.

I cut the wascloth in four equal pieces (squares). My pieces were about 5 inch. So if your washcloth is any smaller or bigger you might want to adjust your cutting. The main thing is: You need to have two squares of the same size. You can even use different washcloths so the softie will have two different sides. I sewed some ribbon on one piece and even some flowers I had lying around. Technically you can put anything you want on there. It would be cool to put the child's name on there.
On the other square I pinned all different pieces of folded ribbon on there. Pin them as close to the edge as possible. Make sure your fold in on the inner side of your fabric, so the both ends of your ribbon are at the edge of your piece of fabric.  Your only concern might be: Pick out ribbon that does not fray on the sides or can be pulled apart easily (Organza or sheer will fray easily). Pin it on your fabric like I did in my first drawing. This might seem weird, but it all turns out well, LOL
Put the two sides on top of each other, good side on good side) and sew three sides closed. Turn the softie inside out (so the good parts will show) and pull all the ribbons straight. You can iron the softie under a piece of cloth to make everything straight. Sew the last side together with your machine or by hand. Et voila: You're done!
This would be a great baby shower gift. If you decide to make one: Please let me know and send a pic: I will post it here. I'd love to see what you made.

Have a good week!


Dochterlief Jinte vindt het heerlijk om op labels te kauwen en te sabbelen. Ik had een spuugdoekje klaarliggen om bij haar in de kast te leggen en daarop lag wat lint wat ik gekocht had klaar om naar mijn scrapkamer te gaan. En plotseling ging het lichtje branden: Ik ging zelf een label knuffel voor haar maken. Het is een supersimpel idee en ik weet dat er al duizenden van dit soort ontwerpen op de markt zijn.
Ik zal proberen om uit te lggen hoe ik het gedaan heb. Zelfs een hele erge beginner kan dit!

Ik heb het spuugdoekje in vier gelijke stukken geknipt (vierkanten) Ik had toen vierkanten vaiets meer dan 10x10 centimeter. als je spuugdoekje kleiner of groter is kun je de maten aanpassen. Je kunt zelfs twee verschillende doekjes gebruiken zodat beide kanten van het knuffeltje anders zijn.
Vervolgens heb ik op een vierkantje een paar lintjes genaaid en nog wat applicaties die ik had liggen. Je kan er van alles en nog wat op doen. Ik kan me voorstellen dat de naam van de baby ook erg leuk is. Vervolgens heb ik het andere lapje gepakt en hier dubbel gevouwen lintjes op gespeld. Zorg er voor dat je zo dicht mogelijk bij de rand speldt. Verder zit de vouw van het lintje aan de binnenkant van de stof (naar het midden dus) Dus de beide uiteinden van het gevouwen lintje zitten aan de rand van je lapje stof. Het enige waar je op moet letten is dat je lint neemt wat niet snel rafels of uit elkaar gaat (Organza en zijdelint doet dit heel snel) Doe dan de goede zijden op elkaar en naar deze aan drie kanten dicht. Het ziet er heel raar uit, maar vertrouw me: Het komt goed.
Draai nu het geheel binnenstebuiten zodat de goede kanten weer aan de buitenkant zitten. Trek alle lintjes recht, je kan zelf het lapje even onder een doek strijken. Naai nu de laatste zijde met de machine of met de hand aan elkaar. Et voila: Je bent klaar! Dit is natuurlijk een heel leuk kraamcadeautje. Mocht je besluiten om er eentje te maken: Laat het me dan weten en stuur een foto, dan plaats ik hem hier! Ik vind het leuk om te zien wat jullie maken.
Een hele fijne week!

The DIY Show Off
The Girl Creative

Monday, October 11, 2010

Another sock Monkey (+instructions) / Nog een Sokaap (met instructies)

I made another Sock Monkey. And I have to say: This one is soooooo cute. I made this one from a small pair of girls socks (I think it would be the size of a girl about 10 yo) and the monkey is about 7" high (from head to toe). I think these are Mary Engelbreit socks, they do have those colors. Please correct me if I am wrong.


Other than my first three monkeys I made this one with the sewing machine and oh my gosh, is that ever fast! I think the whole monkey took me about an hour. Ofcourse you still have to attach the arms, tail and ears by hand but making all the parts with the machine is a huge timesaver. There are so many instructions out here so I am not going to make my own (just call me lazy). The first set of instructions I am posting I found somewhere on the internet and I love the way they look. I you look on the left bottom of the right page you can see the date of publication: November 1955. Isn't that ever cool?
Though this is the the prettiest set of instructions I have they are not really too clear. So please forget this one and look at the second one. They have much more detail so you know how to cut and sew. If you decide to make one: Please show me the results! I would love to see what you came up with.

Have a good week!


Ik heb weer een Sokaap gemaakt en ik moet zeggen: Deze is echt superschattig. Deze heb ik gemaakt van een paar meisjessokken (ik denk ongeveer maat 36) en de aap is ongeveer 18 cm hoog (totale lengte). Volgens mij zijn de sokken van Mary Engelbreit want dit zijn wel haar kleuren maar daar kan ik me ook in vergissen. Anders dan de andere drie apen die ik eerder heb gemaakt heb ik deze met de naaimachine gemaakt. En jeetje, wat scheelt dat een hoop tijd! Natuurlijk moet je nog steeds de armen, staart en oren met de hand aannaaien maar het feit dat je alle lichaamsdelen met de machine kan doen! Ik denk dat ik in een uur klaar was met de hele aap. Over tijd besparen gesproken. Er zijn denk ik duizenden instructies voor het maken van een sokaap op het internet dus ik ga ze zeker niet zelf maken (of noem me gewoon lui......). De eerste afbeelding met instructies heb ik ooit ergens op het internet gevonden en die zien er zo geweldig uit. Als je op de rechterpagina liksonder in de hoek kijkt zie je de datum er afgedrukt staan: November 1955. Echt helemaal geweldig!
Maar ondanks dat het een van de mooiste afbeeldingen met instructies is die ik heb is het zeker niet de duidelijkste. Dus als je van plan bent om een aap te gaan maken gebruik dan niet de eerste maar de tweede afbeelding met instructies. Die laat veel beter zien waar je moet knippen en naaien. Als je besluit om er eentje te maken laat mij dan het eindresultaat zien: Ik zou het heel leuk vinden om te zien wat jullie hebben gemaakt!

Een hele fijne week!
The DIY Show Off

The Girl Creative

Wednesday, September 08, 2010

A homemade tote and planner / Een zelfgemaakte tas en agenda

For all my Canadian and American readers: I hope you had a great Labour Day! As for us: We arrived safely into our little country last Thursday and I can tell you: It is good to be home again! Yesterday school started again and DS Joram was a bit nervous even though he had Miss Esther before in First Grade. He came home for lunch (kids do not have lunch at school here) very relaxed, so that was a good sign. I can not believe that he is in Grade 4 already. Back to our normal lives again.

Joram did not have any major issues getting used to the time change (Toronto Canada is 6 hours behind) DD Jinte has a lot more problems with it. Her entire biological clock is messed up and she did not yet sleep through the night.

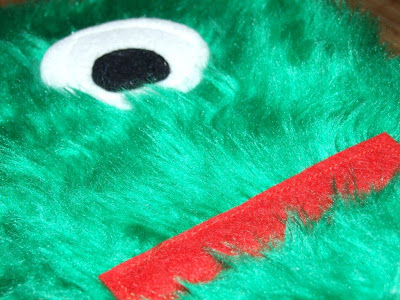
At the end of last school year I made a tote for Joram to use at school. He wanted something no one else would have. So the nutty mom did it again and made him one. I got my inspiration at Craftster and just started it. I was really content with the final outcome but would do the felt mouth different next time. It moves when you sew, next time I have to glue it on before sewing.
Because we would be in Canada for almost six weeks I wanted to do the school supplies shopping before the vacation started (we only have six weeks summer vacation here). This would be the first year Joram needs a planner. But as usual: Joram wanted something different than the others. Geeh, it is going to sound familiar........
It has been a long time since I shopped for school supplies but I was amazed about the collection of planners they have. But most of them are for girls and for boys you only have the 'tough' series like Harley Davidson and Ed Hardy. Not really planners Joram would have liked. So I got the idea of making his planner in the same style as his tote. It was a lot easier than making the tote. This one only took 30 minutes. He already got a lot of compliments over both his bag and his planner.

I hope to be scrapping again somewhere this week, so keep posted!
Have a good week and remember to smile!


Wij zijn afgelopen donderdag weer thuisgekomen uit Canada en ik moet zeggen: Het is heerlijk om weer thuis te zijn. School is gisteren weer gestart en Joram was toch weer een beetje nerveus. Toch had hij Juf Esther in groep 3 ook gehad. Hij kwam tussen de middag thuis en was volledig ontspannen: Een goed teken dus! Ik kan bijna niet geloven dat ie alweer in groep 6 zit. Terug naar het gewone leven!

Joram heeft niet veel moeite gehad met het tijdsverschil (In Canada is het 6 uur vroeger), maar Jinte des te meer. Jinte haar biologische klok is helemaal in de war en ze slaapt 's nachts nog steeds niet door.

Aan het einde van afgelopen schooljaar heb ik voor Joram een schooltas gemaakt. Hij wilde iets anders dan alle anderen en wat die die moeder van hem? Die maakte er eentje voor hem. Ik heb mijn inspiratie gevonden op Crafster en ben gewoon aan de slag gegaan. Ik was erg tevreden met het eindresultaat al zal ik volgende keer het vilt toch anders doen. Het vilt gaat schuiven als je het naait dus moet je dat er eerst op lijmen.
Omdat we zes weken naar Canada zouden gaan wilde ik alle schoolspullen voor Joram al voor de zomervakantie in huis hebben. Dit jaar hebben ze voor het eerst een echte agenda nodig en Joram wilde iets anders dan anders. Goh, dat klinkt inmiddels bekend! Ik ging op zoek naar schoolagenda's en heb me verbaasd over de enorme collectie die er tegenwoordig is (het was al lang geleden dat ik voor schoolspullen heb gewinkeld) Het overgrote deel van de agenda's is toch echt voor meiden en voor de jongens zijn er alleen maar de geijkte thema's als Harley Davidson en Ed Hardy. Beiden onderwerpen waar Joram nu niet echt warm of koud van wordt. Dus kwam ik op het idee om zijn agenda in dezelfde stijl te maken als zijn tas. Dat was een stuk makkelijker en kostte beduidend minder tijd: Na 30 minuten was ik klaar! Hij heeft al veel complimentjes gehad over zijn tas en zijn agenda.

Ik hoop deze week in ieder geval te scrappen dus hou het in de gaten!
Voor iedereen: Een hele fijne week en vergeet niet te glimlachen!

Friday, August 27, 2010

Sock Monkey / Sokken aap

Even though I am not scrapping while here in Canada I seem to keep the urge doing something creative. I have always wanted to make a Sock Monkey and my niece Danielle had a sock monkey kit with great instructions. I helped her getting started and I made one with brother-in-laws old socks (Thanks John!). I really got the hang of it and already made three. Then I decided that our suitcases would be full enough anyway and stopped. I will be making some again when we get home. DS Joram already decided he wants a sock monkey birthday party (in February, LOL)
They are really fun and easy to make and it is amazing to see that you use al most every part of the socks and make it in such a cool little animal. It is nice to make them from all different kind of socks. I thought of posting some instructions here but there are so many instructions on the net that I will not even bother to make instructions. I love CraftsBits and I think their sock monkey pattern is really good and very clear. You can find their instructions HERE. It would also be a great gift for newborns and children, but I would love to get one as an adult, for example with a box of chocolates in its arms. I can see myself making one matching the interior of the recipient. The monkeys I made were all made from socks in adult sizes but you can imagine how cool they are when you make them from kids socks.

It is almost weekend, enjoy it!


Ondanks dat ik niet kan scrappen hier in Canada blijf ik toch de behoefte hebben om iets creatiefs te doen. Ik heb altijd een Sock Monkey willen maken. Mijn nichtje Danielle had een compleet pakket met daarin hele duidelijke instructies. Ik heb haar op weg geholpen en heb er zelf een gemaakt van sokken van mijn zwager (Thanks John!). Vervolgens had ik echt de smaak te pakken en heb er inmiddels al drie gemaakt. Toen heb ik maar besloten om te stoppen omdat onze koffers sowieso wel vol genoeg zouden zijn. Maar als we weer thuis zijn ga ik er zeker nog een paar maken. En Joram heeft al besloten dat hij een Sock Monkey verjaardagsfeestje wil (in februari, hahaha). Ze zijn heel snel en makkelijk te maken en het is verbazend om te zien hoe je bijna alles van de sokken gebruikt en dit dan zo'n leuk dier wordt. Ze zijn geweldig om te maken van allerlei verschillende soorten sokken.
Ik dacht eraan om hier instructies te plaatsen maar er zijn zo ontzettend veel beschrijvingen op het internet te vinden dat ik dat idee maar snel heb laten varen. Ik ben gek op CraftBits and hun instructies zijn erg goed en heel duidelijk. Je kunt ze HIER vinden. Het is een geweldig leuk cadeautje voor pasgeboren babies, voor kinderen en zelfs voor volwassenen. Ik zou het helemaal niet erg vinden om er eentje te krijgen met bijvoorbeeld een doos bonbons in zijn armen. Ik kan me ook voorstellen om er eentje te maken die heel goed past bij het interieur van de ontvanger. De apen die ik gemaakt heb zijn gemaakt van sokken in volwassen maten maar je kunt je voorstellen hoe gaaf ze zijn als je ze maakt van kindersokken.

Het is bijna weekend, geniet ervan!

Friday, April 16, 2010

Free pattern baby dress / Gratis patroon babyjurkje


The other day I bought a new sewing machine. I had a very good one but somehow it does not work properly. I had several people taking a look at it and no one could figure out what was wrong. After I bought the new machine I right away looked for fabric to make DD Jinte a cute little summer dress.
I came across this cute fabric and decided to buy it and just start sewing. I am not a experienced sewer but I always thought I should try more. Well, now I did.
Ofcourse I did not have any pattern or instructions for a dress so I started Googling for a baby dress pattern. I came on this website, Made by Rae, where a (FREE) pattern for a baby dress was posted. The cutest little dress and the pattern was pretty simple. (I needed a simple pattern, LOL) The pattern is for a newborn but Jinte is still so small that she would fit it no problem. 
Well, Rae was right: The pattern was pretty simple and her instructions were very good. I understood it all and the final result looked like a dress and did not fall apart after taking it of my sewing machine. No, I am kidding, it looks very cool, I love the fabric and Jinte looks great with bright colors!
If you are interested in the pattern please visit Rae at her website Made by Rae, you can find the pattern and instructions for the itty-bitty-baby-dress HERE   

Have a good weekend!

Ik heb van de week een nieuwe naaimachine gekocht. Ik heb wel een hele goede maar er is iets mis met de draadvoering en ondanks dat er verschillende mensen naar gekeken hebben doet ie het nog steeds niet goed. Nadat ik de machine gekocht had ben ik natuurlijk gelijk op zoek gegaan naar stof. Ik wilde een stofje voor een leuk zomerjurkje voor Jinte.
Ik vond een geweldig stofje en ben gelijk begonnen. Ik ben niet zo heel ervaren in naaien maar vind dat ik het meer zou moeten oefenen. Dat heb ik dus gedaan!
Ik had natuurlijk geen patroon voor een jurkje en ben gewoon gaan Googlen voor een leuk patroon. Zo kwam ik terecht op de website Made by Rae waar een (GRATIS) patroon opstond voor een geweldig leuk jurkje. Ook was het niet een heel ingewikkeld patroon. Het jurkje was voor een pasgeborene, maar Jinte is heel klein en kan dat makkelijk aan.
Nou, Rae had gelijk; het patroon was heel simpel en de instructies die er bij staan geweldig te volgen (wel in het engels) Ik begreep alles en de jurk viel helemaal niet uit elkaar toen ik het klaar was. Nee, gekkigheid, het jurkje ziet er geweldig uit, ik ben blij met het eindresultaat en Jinte staan felle kleuren heel goed!
Als je geinteresserd bent in het patroon ga dan naar Rae's website, Made by Rae, je kunt het patroon en de instructies HIER vinden.
Een heel fijn weekend!